
Today's post is pure 'craft' with very little (actually no) vintage. Although I do promise to make a few references that people under 30 will have a hard time getting.
I have a few fish tanks around my house. You never know when you will need to house a mouse or hamster or something else (to those that know me and my penchant for taking care of small furries, this will make perfect sense). For those of you that want to play along at home, you can usually find fish tanks at tag sales for under $10. Tanks that have developed (water) leaks are also great to upcycle into Terrariums.
One thing I will mention if I haven't before - I am frugal when it comes to crafting. That is to say I don't like to buy anything new I don't have to. (up and up Yankee thriftness!) At some point I will do a post about how I source some things for gardening without paying a lot, which may or may not end up being helpful.
1) Assemble your ingredients
- Drainage material (I used small white crushed stone )
- Charcoal - this helps with filtration and keeping the soil fresh
- Potting Soil - should be self explanatory (though if you are planting cactii or succulents, you should get a soil suitable for those).
- Sheet moss (helps retain the moisture for the plants and prevent soil erosion)
- Plants & Decorations

 |
| "And Everyone wanted to get in the newspaper story about it..." (Arlo quote!) |

So the above couple pictures are basically the kittehs checking out all the neat stuff I have assembled for this project. Note, I am doing this in the middle of the living room rug, so have put a towel down to make things a little easier for cleanup. Newspaper works well too, but the cats tend to like to play (*read* shred) it.


2. Creating the drainage layer. - I used white crushed stone. I had bought a few bags a couple of years ago and had half a bag still sitting around. I rinsed it a few times and soaked it overnight so as to remove any extra chalky residue and creepy crawlies that may have moved in while it was sitting around.
3. Charcoal layer - Sadly I forgot to get a picture of the charcoal layer, so imagine it in your head.


4. Spread out the Potting Soil. ( Note the Quality Control Dachshund making sure I am doing it correctly.) There should be a 3" to 5" layer of soil, at least deep enough to put the root balls of the plants you are planting in. Note- pack the soil down so there aren't any air bubbles. This will keep the soil from settling too much later and exposing the plant roots.

5. Figuring out the placement of the plants. I left them in the pots and moved them around a bit til I felt I liked the arrangement and each plant had enough room. The plants I chose for this terrarium are: Fancy leafed coleus, Polka dot plant, African violet, and Cock's comb.

6. Planting the plants - make sure they are spaced out enough so they have room to spread a little. You should have put enough soil down so that the root balls are not sticking above the soil level.
 |
| Investigating kitty |

7. I put sheet moss around the bases of the plants sort of sporadically. I have seen terrariums that have it covering the entire potting soil layer, but I didn't want to do that. The sheet moss will help the plants retain moisture, as well as keep the soil from eroding down around the roots.

8. Decorate! - Colored Gravel - you can categorize this under 'decorations' I sprinkled some handfuls of colored aquarium gravel around because I thought it looked nice.

More Decorations - couple of plastic cows (Note the 'walking dead' cow on the left - Calvin (my dachshund) started chewing the cow's face before I realized what he was up to)
 |
| "A little Birdhouse in your soul..." (They Might Be Giants) |

 A small set of twinkle lights. Yes, I am a sucker for twinkle/fairy lights and will add them to just about any craft I can. I got this set at the dollar store - it is about 2 feet long and has a waterproof battery pack (takes (2) AA batteries) so perfect for this environment. (I taped them to the upper wall).
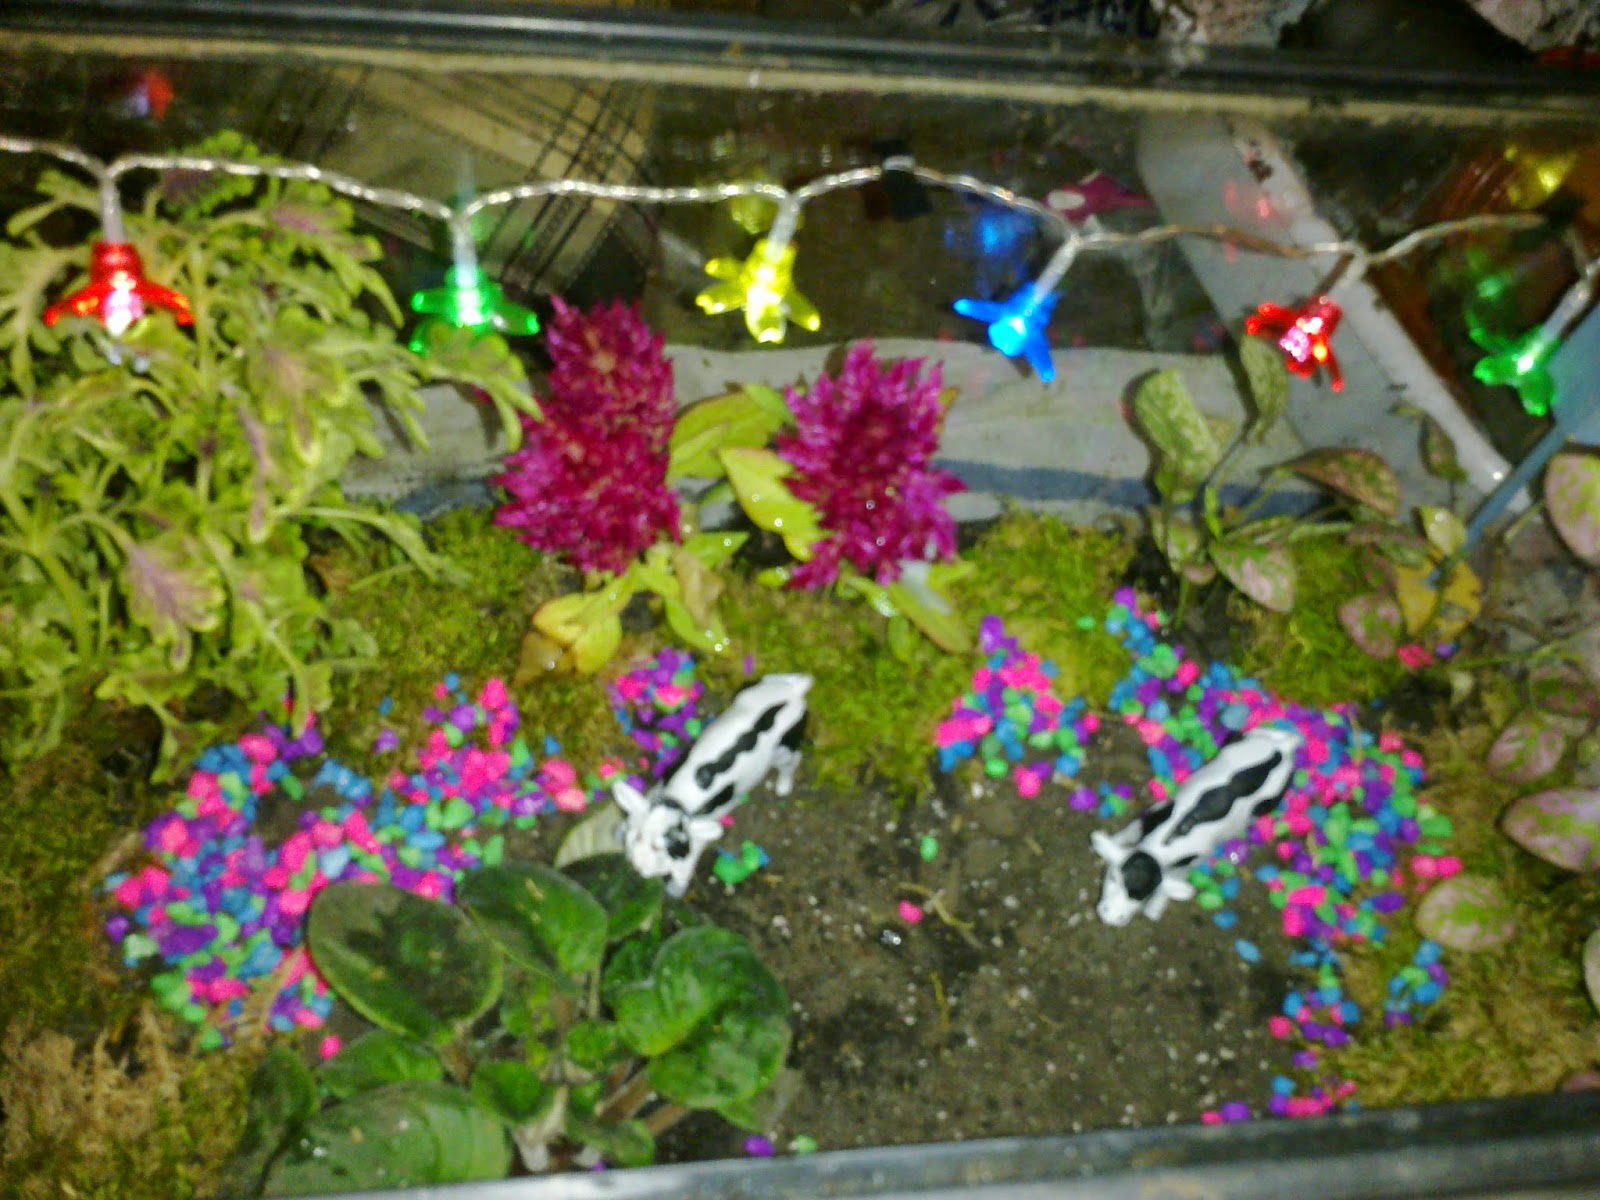
The final masterpiece!


Here is Lightning kitty relaxing on the top of the finished terrarium. I had a screen top that goes with this size aquarium that I am using because well ...cats...plants.....

Update - After about a 2 weeks, the cocks comb died. The polka dot plants (there were 4 ind. plants in the container, and they were a little on the ragged side when I got them) one of the 4 has also died. The African Violet seems to be faring the best. I think maybe I need to move the whole terrarium to where it gets a little more light.
Thanks for reading!
xo Yvonne
No comments:
Post a Comment